模板语法
Vue.js 使用了基于 HTML 的模板语法,允许开发者声明式地将 DOM 绑定至底层 Vue 实例的数据。所有 Vue.js 的模板都是合法的 HTML,所以能被遵循规范的浏览器和 HTML 解析器解析。
在底层的实现上,Vue 将模板编译成虚拟 DOM 渲染函数。结合响应系统,Vue 能够智能地计算出最少需要重新渲染多少组件,并把 DOM 操作次数减到最少。
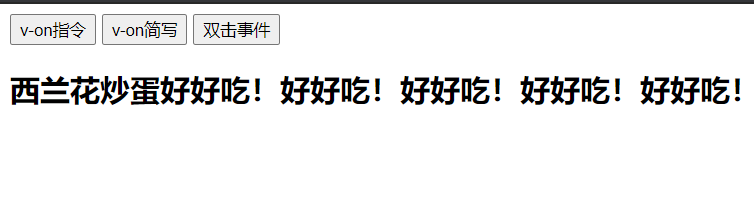
v-on
- 该指令的作用是:为元素绑定事件
- 事件名不需要写on
- 指令可以简写为@
- 绑定的方法定义在methods属性中
- 方法内部通过this关键字可以访问定义在data中的数据
1
2
3
4
5
6
7
8
9
10
11
12
13
14
15
16
17
18
19
20
21
22
23
24
25
26
| <body>
<div id="app">
<input type="button" value="v-on指令" v-on:click="doIt" />
<input type="button" value="v-on简写" @click="doIt" />
<input type="button" value="双击事件" @dblclick="doIt" />
<h2 @click="changeFood">{{food}}</h2>
</div>
<script src="./node_modules/vue/dist/vue.js"></script>
<script>
var app = new Vue({
el: "#app",
data: {
food: "西兰花炒蛋",
},
methods: {
doIt: function () {
alert("学Vue");
},
changeFood: function () {
// console.log(this.food);
this.food += "好好吃!";
},
},
});
</script>
</body>
|
v-on例子
1
2
3
4
5
6
7
8
9
10
11
12
13
14
15
16
17
18
19
20
21
22
23
24
25
26
27
28
29
30
31
32
33
34
35
36
37
38
39
| <body>
<div id="app">
<div class="input-num">
<button @click="add">+</button>
<span>{{num}}</span>
<button @click="sub">-</button>
</div>
</div>
<script src="./node_modules/vue/dist/vue.js"></script>
<script>
// 创建Vue实例
var app = new Vue({
el: "#app",
data: {
num: 1,
},
methods: {
add: function () {
// console.log("add");
if (this.num < 10) {
this.num++;
} else {
alert("别点了,最大了!");
}
},
sub: function () {
// console.log("sub");
if (this.num > 0) {
this.num--;
} else {
alert("别点了,最小了");
}
},
},
});
</script>
</body>
|
v-show
- 该指令的作用是根据真假切换元素的显示状态
- 原理是修改元素的display,实现显示隐藏
- 指令后面的内容,最终都会解析为布尔值
- 值为true元素显示,值为false元素隐藏
- 数据改变之后,对应元素的显示状态会同步更新
1
2
3
4
5
6
7
8
9
10
11
12
13
14
15
16
17
18
19
20
21
22
23
24
25
26
| <body>
<div id="app">
<input type="button" value="切换显示状态" @click="changeIsShow" />
<input type="button" value="累加年龄" @click="addAge" />
<img v-show="isshow" src=".//node_modules/vue/img/1.jpg" alt="" />
<img v-show="age>=18" src=".//node_modules/vue/img/1.jpg" alt="" />
</div>
<script src="./node_modules/vue/dist/vue.js"></script>
<script>
var app = new Vue({
el: "#app",
data: {
isshow: false,
age: 17,
},
methods: {
changeIsShow: function () {
this.isshow = !this.isshow;
},
addAge: function () {
this.age++;
},
},
});
</script>
</body>
|
v-if
- 该指令的作用是根据表达式的真假来切换元素的显示状态
- 本质是通过操作dom元素来切换显示状态
- 表达式的值为true,元素存在于dom中;为false,从dom树中移除
- 频繁的切换使用v-show,反之使用v-if,前者的切换消耗小
1
2
3
4
5
6
7
8
9
10
11
12
13
14
15
16
17
18
19
20
21
22
23
| <body>
<div id="app">
<input type="button" value="切换显示" @click="toggleIsShow" />
<p v-if="isshow">学习Vue</p>
<p v-show="isshow">学习Vue---v-show修饰</p>
<h2 v-if="temperature>=35">热死了</h2>
</div>
<script src="./node_modules/vue/dist/vue.js"></script>
<script>
var app = new Vue({
el: "#app",
data: {
isshow: false,
temperature: 20,
},
methods: {
toggleIsShow: function () {
this.isshow = !this.isshow;
},
},
});
</script>
</body>
|
v-bind
- 该指令的作用是:为元素绑定属性
- 完整写法是 v-bind:属性名
- 简写的话可以直接省略v-bind,只保留 :属性名
- 需要动态的增删 class 建议使用对象的方式
1
2
3
4
5
6
7
8
9
10
11
12
13
14
15
16
17
18
19
20
21
22
23
24
25
26
27
28
29
30
31
32
33
| <style>
.active {
border: 1px solid red;
}
</style>
<body>
<div id="app">
<img v-bind:src="imgSrc" alt="" />
<br />
<img :src="imgSrc" alt="" :title="imgTitle +'!!!'"//
:class="isActive?'active':''" @click="toggleActive" />
<br />
//{}为使用对象的方式
<img :src="imgSrc" alt="" :title="imgTitle +'!!!'"
:class="{active:isActive}" @click="toggleActive" />
</div>
<script src="./node_modules/vue/dist/vue.js"></script>
<script>
var app = new Vue({
el: "#app",
data: {
imgSrc: "https://www.itheima.com/images/logo.png",
imgTitle: "好好学习",
isActive: false,
},
methods: {
toggleActive: function () {
this.isActive = !this.isActive;
},
},
});
</script>
</body>
|
v-for
- 该指令的作用是:根据数据生成列表结构
- 数组经常和v-for结合使用
- 语法是(item,index) in 数据(item可以自己取任意字母代表)
- item 和index 可以结合其他指令一起使用
- 数组长度的更新会同步到页面上,是响应式的
1
2
3
4
5
6
7
8
9
10
11
12
13
14
15
16
17
18
19
20
21
22
23
24
25
26
27
28
29
30
31
32
| <body>
<div id="app">
<input type="button" value="添加数据" @click="add" />
<input type="button" value="移除数据" @click="remove" />
<ul>
<li v-for="(it,index) in arr">
{{index+1}}我想去旅游的地方有:{{it}}
</li>
</ul>
<h2 v-for="item in vegetables" v-bind:title="item.name">{{item.name}}</h2>
</div>
<script src="./node_modules/vue/dist/vue.js"></script>
<script>
var app = new Vue({
el: "#app",
data: {
arr: ["北京", "上海", "广州", "深圳"],
vegetables: [{ name: "西兰花炒蛋" }, { name: "蛋炒西兰花" }],
},
methods: {
add: function () {
this.vegetables.push({ name: "花菜炒蛋" });
},
remove: function () {
this.vegetables.shift();
},
},
});
</script>
</body>
|
v-on 补充
- 事件绑定的方法写成 函数调用 的形式,可以传入自定义参数
- 定义方法时需要定义 形参 来接收传入的实参
- 事件的后面跟上 .修饰符可以对事件进行限制
- .enter 可以限制触发按键回车
- 事件修饰符有多种
1
2
3
4
5
6
7
8
9
10
11
12
13
14
15
16
17
18
19
20
21
22
23
24
| <body>
<div id="app">
<input type="button" value="点击" @click="doIt(666,'老铁')" />
<input type="text" @keyup.enter="sayHi" />
</div>
<script src="./node_modules/vue/dist/vue.js"></script>
<script>
var app = new Vue({
el: "#app",
methods: {
doIt: function (p1, p2) {
console.log("做IT");
console.log(p1);
console.log(p2);
},
sayHi: function () {
alert("吃了没");
},
},
});
</script>
</body>
|
v-model
- 该指令的作用是便捷的设置和获取表单元素的值
- 绑定的数据会和表单元素的值相关联
- 绑定的数据<—>表单元素的值
1
2
3
4
5
6
7
8
9
10
11
12
13
14
15
16
17
18
19
20
21
22
23
24
| <body>
<div id="app">
<input type="button" value="修改message" @click="setM" />
<input type="text" v-model="message" @keyup.enter="getM" />
<h2>{{message}}</h2>
</div>
<script src="./node_modules/vue/dist/vue.js"></script>
<script>
var app = new Vue({
el: "#app",
data: {
message: "学习Vue",
},
methods: {
getM: function () {
alert(this.message);
},
setM: function () {
this.message = "好好学习";
},
},
});
</script>
</body>
|